Scripts
Script components allow you to run small JavaScripts to make your prototypes even more interactive. You can for example use them to set data binding values, load or send data to a server, or calculate dynamic values, like the sum of two input fields.
Please note that Flowrabbit is still in its early developmental stages. Because of this, we advise using Chrome when trying out Flowrabbit since it has been tested most extensively in Chrome, and scripts currently do not work in Safari.
Introduction
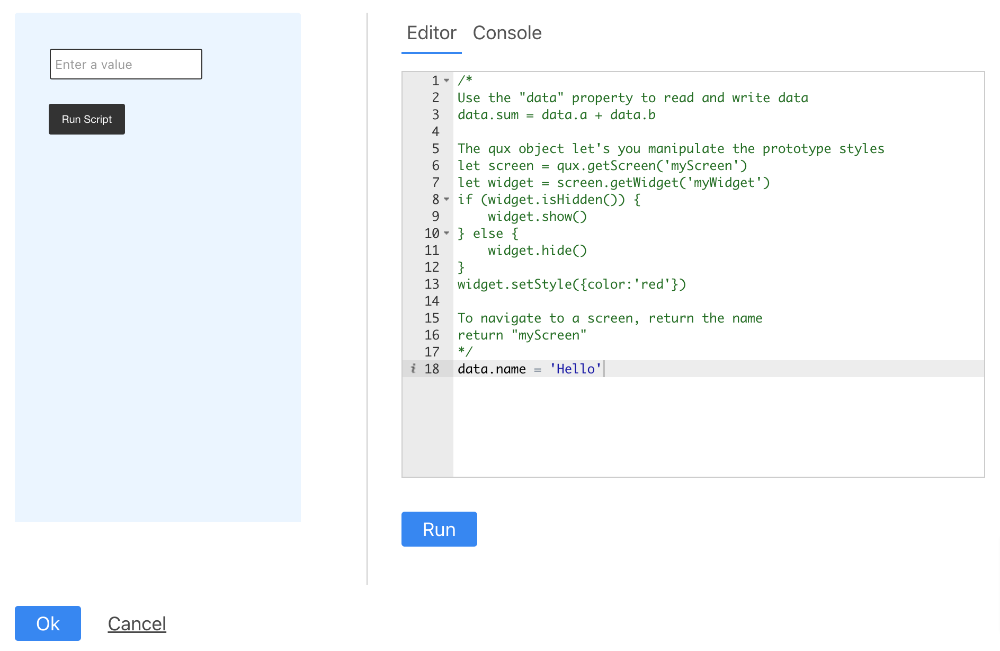
Select the icon in the right toolbar and drop the widget on the canvas. When you select the script widget, you can see in the right menu an "Edit Script" button. Clicking it will open the Script editor. The editor has on the right side, the simulator and on the left a simple JavaScript editor. You can enter your scripts there. Click on "Run" to execute and test the script. In the "Console" tab, you can see the output of the script.
Basics
The script has access to Flowrabbits objects, the "data" binding and the "qux" object.
- The data object allows you to read and write data through the data binding that is defined for the components in your prototype.
- The qux object allows you to change the styles for the components or to change the visibility.
- The event object shows from which widget the script was triggered.
Scripts can be executed on three different events.
- If the user clicks on a component and the component is wired to a script. Use this to trigger the actions only on explicit user interactions.
- On data-binding changes. For instance, the user changes the value of a text field. Use this to update other components are set dynamic data-binding values.
- When the simulator is loaded. Use this to prefetch data, or set data.
The script can also return a value. If the value matches the name if a screen, the simulator will load the corresponding screen.